

✦
Where Artistry Begins
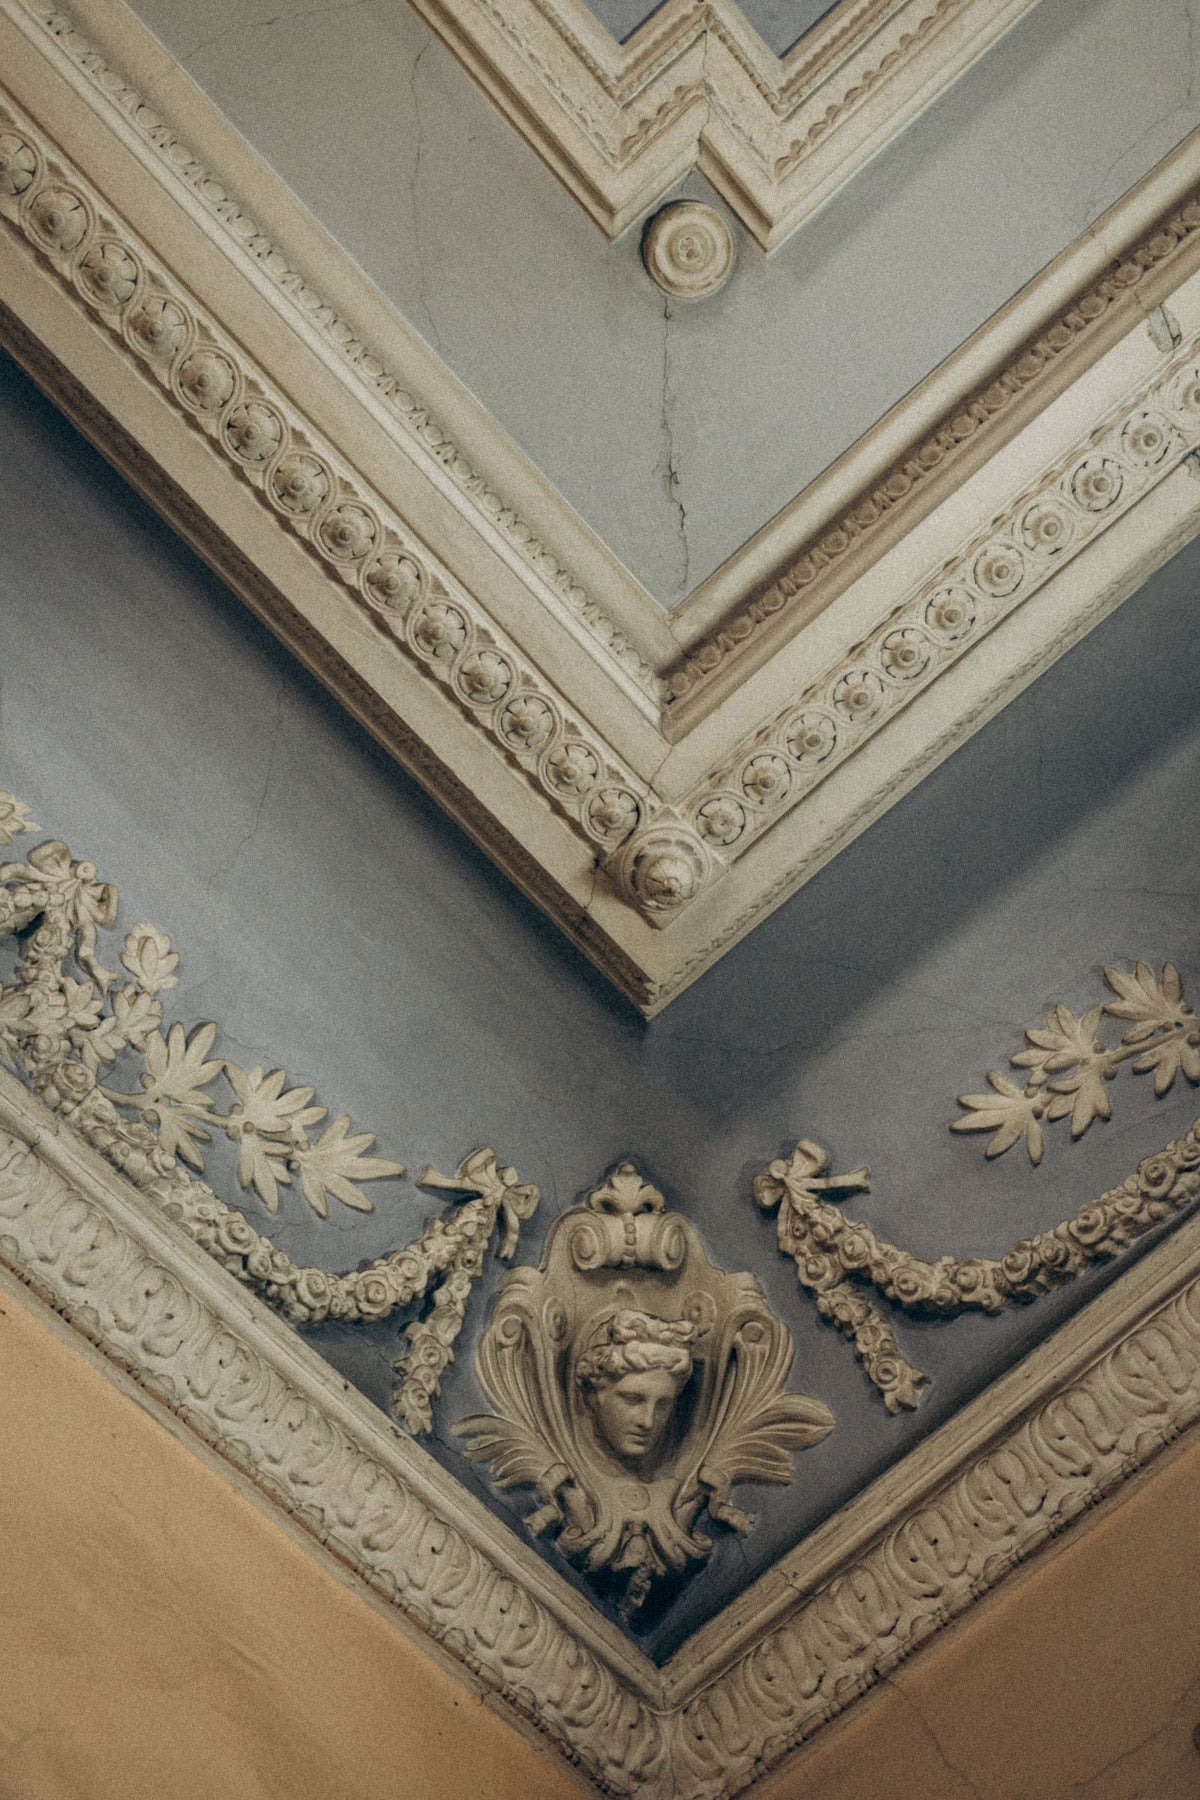
To paint coving properly, clean it, fill and sand any cracks, prime bare plaster as the maker recommends, then apply thin coats with a good brush, cutting in neatly where the coving meets the wall and ceiling. On ornate cornice, the rule is thin coats and patience, because every heavy coat fills a little more of the detail. If old cornice is already clogged or the paint is flaking, painting over it will not fix the problem, and it may need cleaning back first.
This guide covers preparation, filling cracks, choosing paint, cutting in, painting ornate cornice, when paint build up needs removing, and when removing old coving is the wrong answer. If your cornice needs more than paint, our plaster cornice and coving page explains how we restore and match period profiles.

The most common faults are a crack along the top or bottom edge where coving meets ceiling or wall, open joints between lengths, and chipped mitres at the corners. Rake out any loose material, dampen absorbent plaster lightly if the filler maker recommends it, and press in a suitable filler. A flexible decorator's caulk is often used for fine cracks along the edges, where there is a little seasonal movement, while a plaster based filler suits chips and joints that need to be sanded and shaped. Let fillers dry fully and sand them flush before painting.
Cracks that keep coming back, or a gap that is widening, usually point to movement in the ceiling or wall behind. That needs looking at before any decorating.

Always start with the guidance from the coving maker and the paint maker, because the right system depends on the material. A few points we can confirm.
Conservation writers on buildingconservation.com point out that excessive paint build up obliterates fine decorative detail, turning fine ornament into dull shapes. Each new coat you add makes that a little worse, so ornate cornice deserves a gentler approach.
Painting detail in a different colour is a good way to bring a cornice back to life. The Victorian Society notes that painting is reversible, which makes it a low risk way to try colour on period plasterwork.
If the egg and dart has become a row of soft lumps, or the paint is crazed and flaking, more paint will not help. The Victorian Society advises that distemper may need steam to soften it, then careful picking out with wooden tools, and that stripper makers' instructions should be followed. Building conservation guidance stresses that test areas are essential before any method is used across a whole cornice, and warns that some strippers can damage plaster. On historic or delicate work, this is a job for a specialist.

Plain modern coving that is simply stuck on can usually be cut free along both edges with a sharp knife and eased off with a wide scraper, working slowly so you do not pull away the surface of the wall or ceiling. Expect some making good afterwards.
Period cornice is different. It may have been run in place, keyed into the ceiling, or be holding the edge of a lath and plaster ceiling together. RICS guidance on traditional plasterwork says retention and repair should be the first consideration, and warns that the plaster nibs gripping the laths can be damaged by extra loading, renovation work or vibration. Pulling at an old cornice can bring part of the ceiling with it. In most period rooms, repairing a damaged run and matching new lengths to the old profile is safer and looks better than removing it. Our guide to Victorian, Georgian and Edwardian coving explains how repairs are matched.
Often, yes. Painting coving with the ceiling makes the room feel taller, while painting it with the walls makes it feel cosier. Both work.
Usually, but check the coving maker's advice, as some coatings and solvents can attack polystyrene.
Our guide on how to fit plaster coving covers fixing, mitres and filling joints.
Where to go next. If your cornice needs repair, cleaning back or new matching lengths, see what we restore and fit on our plaster cornice and coving page, or send photos through our contact page and we will tell you what we think it needs.
Where corbels come from in architecture, how corbels, brackets and consoles differ, where to use decorative plaster corbels, the main sty...
CorniceWhat dado rails and picture rails were originally for, where they usually sit on the wall, how they appear in Georgian, Victorian and Edw...
CorniceWall panelling ideas by style and by room, how to plan half height, full height and box panels, and an honest comparison of plaster panel...
GildingWhere urushi comes from, how traditional Chinese and Japanese lacquer is made and decorated with gold, how Europe imitated it with japann...
Feature WallsWhat makes a lacquered wall different from gloss paint, why preparation and flatness matter so much, and the colours, rooms and care that...
GildingHow to tell real gold leaf from gold paint, the difference between water and oil gilded frames, how to clean a gilded mirror safely and w...

Authentic Venetian plaster, machine-tinted to your colour and made for each order. Materials, installation and master-led training, nationwide and international, since 2021.
One list, run by the people who make the material. No noise, and nothing we would not want to read ourselves.
We email as the house has something worth saying, never daily. Unsubscribe from any email, or reply STOP to any text. We never pass your details to anyone.